How to Check a 12V Battery with a Multimeter
As an Amazon Associate we earn from qualifying purchases.
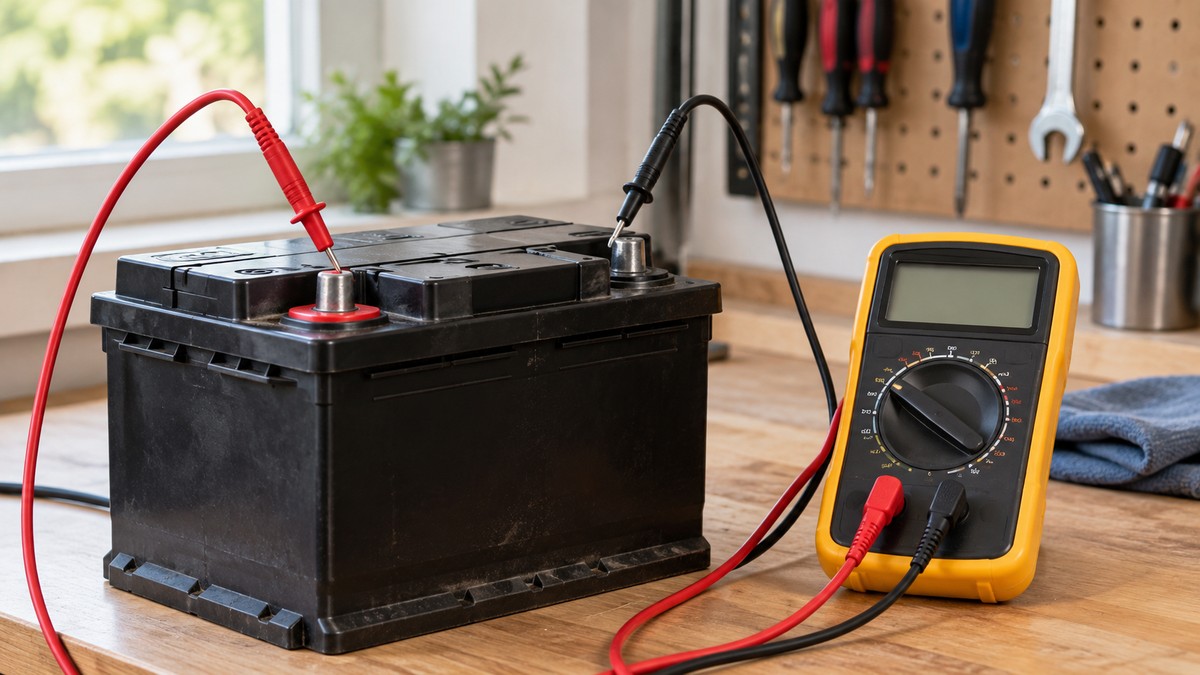
How to check a 12V battery with a multimeter comes down to three readings: the resting voltage with the engine off, the lowest voltage while the engine cranks, and the voltage with the engine running. Fluke’s battery guide calls about 12.6 V fully charged at rest, but a voltage reading shows charge, not health. Work on mains circuits can kill, a meter’s CAT rating must suit the circuit it touches, and panel or service work belongs to a licensed electrician. This guide stays on the low-voltage side: a battery, a DC volts setting and a pair of test leads.
Electrical safety first
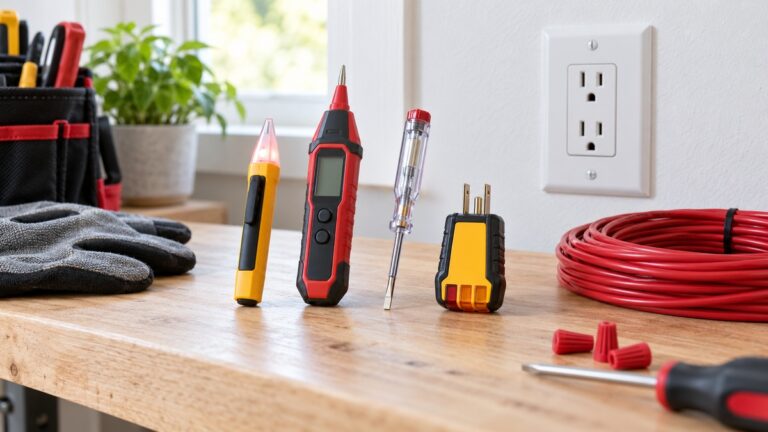
Mains wiring can kill. Outlets, breaker panels and service wiring are outside this guide, and so is any step that touches household circuits. Panel or service work belongs to a licensed electrician. A 12V battery is a different job, but a meter still has to suit what it touches, and the CAT rating is the label that says so. Fluke’s manual for its Model 88 V describes CAT III as protection against transients in fixed installations such as distribution panels, feeders and short branch circuits, and CAT IV as protection at the primary supply level, such as an electricity meter or a utility service. Your meter’s listing or manual states its own rating. If the listing does not state a CAT rating, do not assume one, and do not treat the meter as safe for household mains.
The same manual says to use caution above 30 V ac, 42 V ac peak or 60 V dc, because “These voltages pose a shock hazard.” A 12V battery sits far below the 60 V dc figure, so the hazards here are different. Fluke’s battery guide warns that lead-acid batteries “can emit explosive gas and contain acid,” and the meter manual says “Do not operate the Meter around explosive gas, vapor, or dust.” OSHA’s construction rule 1926.441 calls for ventilation “to prevent the accumulation of an explosive mixture.” Yuasa’s manual says: “Always wear eye protection, protective gloves and protective clothing when handling a battery.” Odyssey says the short-circuit current of its AGM2 batteries is “Typically thousands of amps,” so a tool or lead bridging both terminals is a serious hazard. Hybrid and electric vehicle high-voltage systems and airbag circuits are out of scope; this guide covers an ordinary 12V starting battery.
Quick answer
- Set the meter to DC volts, put black on the negative terminal and red on the positive terminal, and read the display once the battery has rested.
- Fluke lists about 12.6 V as fully charged and below 12.0 V as likely discharged or weak. Yuasa lists 12.6 V for a conventional battery and 12.8 to 13.0 V for an AGM battery.
- Watch the display while the engine cranks. Yuasa says a 12-volt battery that drops below 9.5 V while cranking, at 70 degrees F, needs to be replaced.
- With the engine running, Fluke treats a reading above 13.0 V as charging voltage. A passing voltage check still does not prove the battery can start the engine.
What you need before you start
You need a digital multimeter whose DC volts range covers the running voltages in the table under Step 5, which top out at 14.7 V in these sources, a pair of test leads in good condition, and a clear view of both terminals. Fluke’s battery guide puts its 88V meter’s dial on DC volts, with the red lead in the V/Ω jack and the black lead in COM, and picks the 6 V or 60 V range depending on battery condition. That range advice belongs to a manual-ranging meter, so follow your own manual.
Inspect the terminals first. Fluke says to look for corrosion or looseness and to turn off all accessories before a resting reading. Its meter manual also says to inspect the test leads for damaged insulation or exposed metal, and its safety list includes “Avoid working alone.” For a meter chosen for this job, see our roundup of multimeters for testing car batteries, and read the CAT rating from the listing.
Step 1: Let the surface charge settle
A battery that was just charged or just ran holds a surface charge, which makes the voltage read high. The opened sources agree on the idea and disagree on the wait. Battery University adds that an open circuit reading needs a battery “floating” with no load attached, and says “This is not the case with modern vehicles,” because parasitic loads keep drawing current. Treat a reading from a modern vehicle as an estimate.
| Source | What it says to do before reading | Battery covered |
|---|---|---|
| Fluke battery guide | Turn the headlights on for about 1 minute, then off, if the vehicle was recently running | Vehicle battery |
| Fluke Model 88 V manual | Turn the headlights on for 1 minute to bleed surface charge, then read with the lights off | Vehicle battery |
| Yuasa technical manual | Turn the ignition on for about three minutes, turn it off, wait about 10 minutes; not needed if the battery sat 1 hour after charging | Powersports batteries |
| Odyssey AGM2 technical manual | Wait at least four hours after charging or at least 30 minutes after a discharge | AGM2 batteries |
| Battery University | Rest in the open circuit state for at least four hours; manufacturers recommend 24 hours for lead acid | General |
The shortest wait in the table is the one-minute headlight step and the longest is 24 hours, or 1,440 minutes, a spread of about 1,400 to 1. A quick check after the headlight step is a rough number, and a rested battery gives a better one. Odyssey says: “Measurements will not be accurate if adequate rest time is not allowed.”
Step 2: Measure the resting voltage
With accessories off and the engine off, connect the black lead to the negative terminal and the red lead to the positive terminal. Fluke’s meter manual says to connect the common test lead before the live test lead and to disconnect the live lead first, which in this job means black on first and red off first. Touch the probes to the terminals and read the display.
Write the number down with how long the battery rested, because a reading without a rest time is hard to compare later. For meter choices, see our guide to measuring DC voltage with a multimeter.
Step 3: Read the number
Fluke’s guide gives one scale for vehicle batteries. Yuasa’s powersports manual separates conventional from AGM batteries, because an AGM battery reads slightly higher when full.
| Resting reading | Fluke battery guide | Yuasa technical manual |
|---|---|---|
| 12.8 to 13.0 V | Not listed | Fully charged AGM battery |
| About 12.6 V | Fully charged | Fully charged conventional battery |
| 12.5 to 12.8 V | Not listed | AGM battery that is 75 to 100 percent charged |
| About 12.4 V | About 75 percent charged | Conventional battery at 75 percent |
| About 12.2 V | About 50 percent charged | Not listed |
| Below 12.0 V | Likely discharged or weak | Not listed |
Fluke’s meter manual prints a different table: 12.60 to 12.72 V is 100 percent, 12.45 V is 75 percent, 12.30 V is 50 percent and 12.15 V is 25 percent, at 80 degrees F. The two Fluke documents disagree slightly on where 50 percent sits, 12.2 V against 12.30 V, so treat both as approximations. If your reading falls between two rows, report a range instead of a single percentage.
A low reading is a prompt to charge and recheck, not a verdict. Yuasa says a battery under 75 percent after charging is probably no good, but it advises charging again before condemning it, and says that if the battery is still not close to 100 percent, “it needs to be replaced.” For a dedicated tool, see our battery voltage tester roundup.
Step 4: Watch the voltage while the engine cranks
A resting reading can look fine on a battery that cannot carry a starter motor. Fluke’s guide suggests a MIN/MAX function: “Use MIN/MAX to catch voltage drops when starting the engine.” Yuasa describes the same idea for a powersports vehicle: connect the voltmeter directly to the battery, crank the starter, and note the reading just before the engine starts. If the voltage drops below 9.5 V at 70 degrees F while the engine cranks, Yuasa says the battery needs to be replaced. That figure comes from a manual for powersports batteries, and the pages we opened give no matching number for a car battery, so treat 9.5 V as a reference point and not a universal pass mark.
Here is a worked example with our own assumed readings. Suppose the resting voltage is 12.6 V and the lowest cranking reading is 10.1 V. The drop is 12.6 − 10.1 = 2.5 V, and the margin above Yuasa’s 9.5 V floor is 10.1 − 9.5 = 0.6 V. If the same battery reads 9.3 V on a colder day, the margin is 9.3 − 9.5 = −0.2 V, below the floor. A log of resting and cranking numbers shows a shrinking margin before a no-start. Fluke’s guide keeps the order straight: “Always check voltage before load testing a battery.” Keep leads and hands clear of belts and moving parts while the engine turns.
For a proper load test with a dedicated tester, see our post on how to load test a battery with a multimeter. Odyssey’s manual says a CCA load tester needs a battery that is at least 75 percent charged, which it equates to 12.6 V or higher for its AGM2 batteries.
Step 5: Check the voltage with the engine running
Start the engine and repeat the measurement at the terminals. Fluke’s guide treats a reading above 13.0 V as charging voltage and says a good alternator should produce 13.7 to 14.7 V under normal conditions. The documents we opened disagree a little on the range.
| Source | Running voltage it gives | Context |
|---|---|---|
| Fluke battery guide | 13.7 to 14.7 V from a good alternator; above 13.0 V indicates charging | Engine running |
| Fluke automotive tests article | Typically 13.8 to 14.7 V under load | Charging system output |
| Odyssey AGM2 technical manual | 14.2 to 14.5 V at 77 degrees F | Standard automotive alternator, starting application |
| Yuasa technical manual | 13.0 to 14.5 V at 3,000 to 4,000 rpm | Powersports charging system |
Our own comparison: the lower bounds run from 13.0 to 14.2 V and the upper bounds from 14.5 to 14.7 V. A reading of 14.0 V fits the two Fluke bands and the Yuasa band but sits below Odyssey’s. Fluke says to consult the service manual for target values, and Yuasa adds that a running voltage equal to the resting voltage means the charging system is not working. For voltage lost in cables and connections, see our voltage drop tester roundup.
What a voltage check cannot tell you
Fluke’s meter manual is direct: “Voltage tests only tell the state of charge, not the battery condition.” Yuasa says the same from the battery side: “The open circuit voltage test is not conclusive.” and “A load test must be performed to determine actual battery performance after charging.” A battery can read a healthy 12.6 V and still fail when the starter pulls current, as Yuasa’s manual notes. Battery University’s testing article calls capacity the leading health indicator and says a snapshot from a CCA tester shows the resistive battery condition only.
Use the multimeter for what it does well: it shows whether the battery is charged, whether the alternator lifts the voltage, and whether the cranking dip is plausible.
Mistakes to avoid
- Reading right after a charge or a drive. Surface charge inflates the number; the table under Step 1 lists the waits.
- Leaving accessories on. Fluke says to turn them off before a resting reading.
- Treating 12.6 V as proof of health. Fluke’s manual and Yuasa both say voltage does not show condition.
- Applying one maker’s cranking floor to every battery. The 9.5 V figure is from Yuasa’s powersports manual.
- Using a meter that does not suit the circuit. The listing or manual must state the CAT rating.
How we chose
This is a method guide, not a product list, so no products were ranked. We kept only steps and figures that a page opened on 2026-10-21 states: two Fluke web pages, Fluke’s Model 88 V manual, Yuasa’s powersports technical manual, Odyssey’s AGM2 technical manual, two Battery University articles and the OSHA battery rule. Each quoted sentence was matched against the text of its page. Where two manuals gave different numbers, both are shown. The cranking example and the range comparison are our own arithmetic.
What we could not verify: what the sources do not say
The pages we opened do not state a CAT rating for the meter you own, so use its listing or manual. They do not give a cranking floor for a car battery, only Yuasa’s 9.5 V for powersports batteries at 70 degrees F. They do not say how many minutes after the headlight step a reading becomes reliable, and they give no temperature correction for the resting bands. The Odyssey and Yuasa bands are tied to those makers’ own battery lines. Nothing here covers hybrid or electric vehicle packs.
Frequently asked questions
What voltage should a healthy 12V battery show?
At rest, about 12.6 V counts as fully charged in Fluke’s guide, and an AGM battery is expected to read higher, 12.8 to 13.0 V, in Yuasa’s manual. Fluke’s own manual prints 12.60 to 12.72 V as 100 percent at 80 degrees F, so a reading in that neighborhood is a good sign of charge.
Should the engine be running when I measure?
Only for the charging check. Take the resting reading with the engine and accessories off, then the cranking and running readings.
Why does my battery read high right after a drive?
The cause is surface charge. Fluke’s guide and Fluke’s meter manual both suggest about one minute of headlights to bleed it off, while Odyssey asks for at least four hours after charging for its AGM2 batteries.
Can a multimeter tell me the battery is bad?
Only in obvious cases, such as a reading far below 12.0 V that does not recover after charging. For a battery that reads normally but fails to start the engine, the sources call for a load test.
Which meter setting should I use?
Use DC volts. Fluke’s guide puts the dial on VDC with the red lead in the V/Ω jack and the black lead in COM. Check your own manual for your meter’s jacks and ranges.
Bottom line
Rest the battery, read DC volts across the terminals, compare the number with your maker’s band, watch the cranking dip and the running voltage, and order a load test before you condemn or trust the battery.
Sources
- https://www.fluke.com/en-us/learn/blog/digital-multimeters/how-to-test-a-battery-with-a-multimeter (opened 2026-10-21)
- https://www.fluke.com/en-us/learn/blog/digital-multimeters/common-automotive-testing-with-a-multimeter (opened 2026-10-21)
- https://assets.fluke.com/manuals/88v_____umeng0100.pdf (opened 2026-10-21)
- http://www.yuasabatteries.com/wp-content/uploads/2017/07/TechManual.x78244.pdf (opened 2026-10-21)
- https://www.odysseybattery.com/wp-content/uploads/AMER-EN-TM-ODY.pdf (opened 2026-10-21)
- https://batteryuniversity.com/article/bu-903-how-to-measure-state-of-charge (opened 2026-10-21)
- https://batteryuniversity.com/article/bu-905-testing-lead-acid-batteries (opened 2026-10-21)
- https://www.osha.gov/laws-regs/regulations/standardnumber/1926/1926.441 (opened 2026-10-21)
As an Amazon Associate we earn from qualifying purchases.