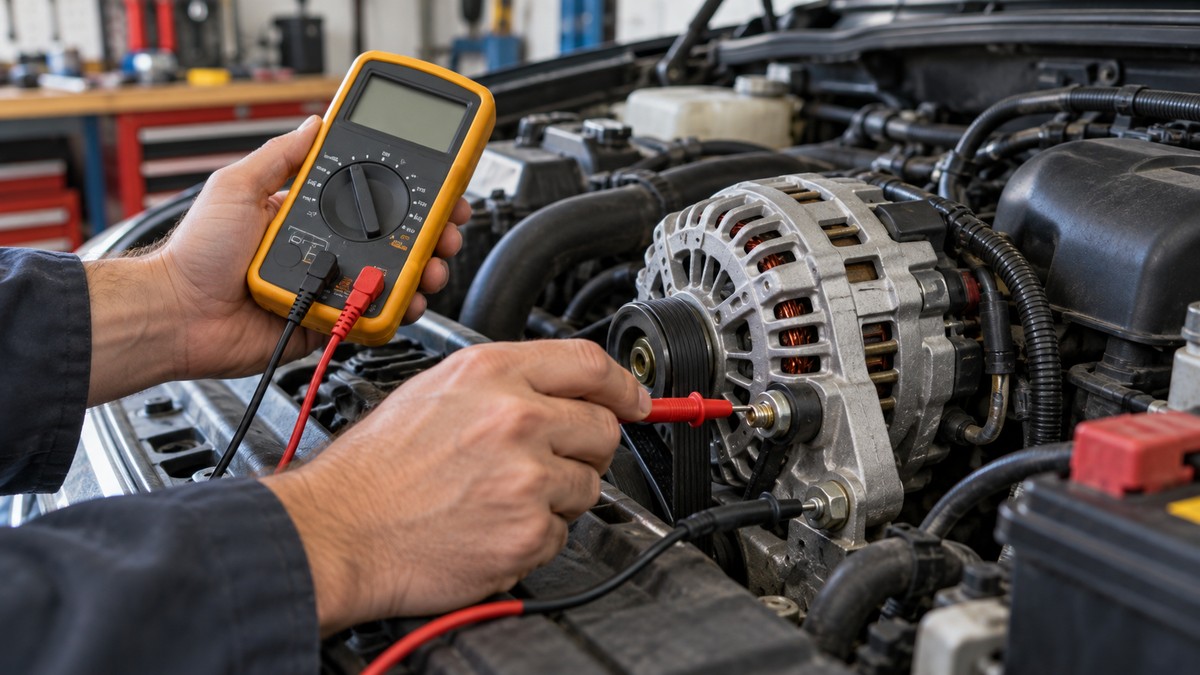
How to Check Alternator Output With a Multimeter
As an Amazon Associate we earn from qualifying purchases.
How to check an alternator with a multimeter comes down to two DC voltage readings taken across the battery terminals: one with the engine off, and one with the engine running. Fluke’s battery voltage guide puts the normal running range at 13.7 to 14.7 V. This post covers a 12 V car charging system only. It does not cover airbag systems, high-voltage hybrid or EV systems, or the AC ripple test.
Quick answer
- With the engine running, Fluke gives 13.7 to 14.7 V as the normal range at the battery terminals.
- The engine-off reading checks the battery, not the alternator, so it comes first.
- Belts, the fan, sparks and battery gas are the main hazards in this test.
- The sources do not give a CAT rating for a 12 V vehicle circuit, or a DC limit with accessories on.
Electrical safety first
Work on mains circuits can kill. Before you measure anything, check that the meter’s CAT rating suits the circuit you are testing, and read the rating from the listing or the manufacturer’s manual. Panel and service work belongs to a licensed electrician.
This post stays on a 12 V vehicle battery and its charging circuit. It gives no steps for a wall outlet, a panel, a service connection or any mains wiring. Shock is the hazard that matters most here. OSHA says its electrical standards address dangers such as electric shock and electrocution. Its rule on safety-related work practices exists to prevent electric shock when work is near or on energized circuits. Fluke’s multimeter guide adds that shock occurs when the human body becomes part of an electrical circuit.
A CAT rating is a category tied to where a meter is used. Fluke’s IEC category article describes CAT II as single-phase receptacle-connected loads such as appliances and portable tools. It places equipment in fixed locations such as switchgear in CAT III, and the utility connection and service entrances in CAT IV. A Fluke safety information sheet for an insulation multimeter (models 1587 FC, 1587 and 1577) states CAT IV 600 V and CAT III 1000 V for that instrument. A Fluke electrical resource page also advises using test instruments rated for the voltage or current you are measuring.
The sources we opened do not give a CAT rating for a 12 V vehicle circuit, so read the rating from your own meter’s listing or manual before you connect it. OSHA limits work on energized circuit parts to qualified persons. This site’s advice goes further for panels and service work: leave it to a licensed electrician.
Battery and belt safety before you start
Explosive gas
Lead-acid batteries need care for two reasons: they can emit explosive gas, and they contain acid. Fluke says to use caution around lead-acid batteries for exactly that reason. The gas is hydrogen. WVU’s environmental health and safety page says a lead-acid battery produces hydrogen and oxygen during charging, and both gases are flammable and explosive. Purdue’s battery safety handout puts the hydrogen explosive range at 4 to 74 percent by volume of air. Fluke ties the engine-running reading to charging voltage, so treat the battery as a gas source for the whole test.
Sparks and metal tools
Sparks and metal contact are the ignition risk. Mazda’s 2026 CX-50 manual warns against letting metal tools contact either battery terminal, and says hydrogen gas could ignite. Purdue says to keep tools and other metallic objects away from uncovered batteries. WVU says a spark can ignite gases that build up in a battery. Keep flames and sparks away from the battery while the engine runs.
Acid
Acid is the second hazard. Purdue lists chemical burns from sulfuric acid among the hazards of lead-acid batteries. WVU says the electrolyte is a solution of sulfuric acid (35 percent) and water (65 percent). Mazda warns that battery fluid can cause serious injuries if it gets in the eyes or on the skin. Fluke also notes that lead-acid batteries contain acid, and advises inspecting the terminals for corrosion or looseness before testing.
Belts, pulleys and the fan
Keep your hands, leads and clothing clear of belts and pulleys. Fluke’s battery guide says to keep hands clear of fan belts and moving parts, and its ripple guide asks for the same clearance and adds safety glasses. A California State University, Long Beach engine lab sheet lists amputation from fan blades, belts and pulleys as a potential hazard.
This draft gives no battery disconnect steps. The sources we opened describe this test with the leads on the battery terminals, not with the battery removed.
What you need
- A digital multimeter with a DC volts setting. Fluke’s battery guide sets the dial to VDC, with the black lead in COM and the red lead in V/Ω.
- A DC range that covers readings near 15 V. Fluke’s battery guide lists 6 V and 60 V ranges, and a 6 V range cannot show a reading near 14 V, so use the 60 V range for the running-engine step.
- Safety glasses, as Fluke’s ripple guide recommends.
- Probes that reach the battery posts. Fluke’s ripple guide says probing the battery posts is electrically equivalent to probing the alternator B+ stud, and safer when the stud is awkward or carries exposed current.
- A meter with MIN/MAX, if you have one. Fluke’s battery guide suggests it for catching voltage drops when the engine starts.
For meter choices that suit car work, see our automotive multimeter roundup. For a voltmeter aimed at cars, read our guide to digital voltage meters for cars.
Test steps
Step 1: Read the battery with the engine off
Turn off all accessories before taking a resting voltage measurement. If the vehicle was recently running, turn on the headlights for about one minute, then turn them off. Fluke says this removes surface charge and gives a more accurate reading. Its battery guide also says to check voltage before any load test of the battery.
Touch the red lead to the positive (+) terminal and the black lead to the negative (−) terminal, then observe the reading. Fluke’s battery guide gives these resting values: about 12.6 V is fully charged, about 12.4 V is about 75 percent charged, about 12.2 V is about 50 percent charged, and below 12.0 V is likely discharged or weak. Fluke describes battery voltage as a way to find the state of charge.
Step 2: Read the alternator with the engine running
Start the engine and repeat the test at the terminals, with the leads fully inserted and your hands clear of moving parts. Fluke puts the normal running range at 13.7 to 14.7 V under normal conditions. The same guide says a reading above 13.0 V with the engine running indicates charging voltage. If your meter has MIN/MAX, Fluke suggests using it to catch voltage drops while the engine starts.
Step 3: Repeat with accessories on
Fluke’s ripple guide has the engine idle for about 30 seconds with accessories on, so the charging system reaches a steady state. It then switches on the high beam headlights, HVAC blower and rear defogger to load the system. This post uses the same load for the DC reading only. Record the voltage with the load on and compare it with the Step 2 value. The sources we opened do not give a DC limit for that load, so the comparison is descriptive, not a pass or fail.
Reading the results
- Engine off, about 12.6 V: fully charged, according to Fluke. Below 12.0 V: likely discharged or weak.
- Engine running, 13.7 to 14.7 V: the normal range in Fluke’s battery guide.
- Engine running, above 13.0 V: Fluke says this indicates charging voltage.
- Engine running, outside 13.7 to 14.7 V: the sources we opened do not say what this means. Do not call the alternator faulty based on these sources alone.
Common mistakes
- Reading the battery straight after driving. Fluke says the headlight step removes surface charge and gives a more accurate reading.
- Setting the meter to AC volts. Fluke’s battery guide uses DC volts. On the meter in Fluke’s ripple guide, AC mode blocks the 14 V DC level and shows only the AC ripple component, so it cannot show the charging voltage.
- Loose leads. Fluke’s battery guide says the test leads must be fully inserted.
- Skipping the terminal check. Fluke says to inspect battery terminals for corrosion or looseness before testing.
- Letting hands, leads or clothing near belts and pulleys. Fluke’s battery and ripple guides both warn about this.
- Treating the engine-off value as the alternator output. Fluke ties the engine-off values to the battery’s state of charge.
How we chose
This draft uses only pages fetched with curl on 2026-10-21, and each quoted phrase was checked against the fetched text. Search results were used only to find URLs. Of the 17 pages fetched, 12 support statements in this post, 3 loaded but did not support a statement, and 2 returned 403 and were not counted. Six of the twelve are Fluke pages, two are OSHA pages, three are university pages, and one is a vehicle manufacturer manual. Most of the test steps therefore rest on one manufacturer, which is why the running-engine range is marked as a single-source figure below. We kept manufacturer pages for test steps and meter setup, government pages for shock hazards and work rules, university pages for battery and belt hazards, and a vehicle manufacturer manual for battery handling. Parts-retailer blogs and hobbyist pages that appeared in search results were not opened and are not cited, because this site does not use retailer pages for procedure or safety claims.
What we could not verify
- The 13.7 to 14.7 V range comes from one page we fetched. We did not find a second fetched source with the same range, so treat it as a single-source figure.
- The sources we opened do not include a second manufacturer’s charging specification, so no manufacturer comparison is possible from them.
- The sources do not give a CAT rating for a meter used on a 12 V vehicle circuit.
- The sources do not give a DC voltage limit for a reading taken with accessories on.
- The sources do not give an engine speed for the running-engine reading. Fluke’s battery guide says to start the engine, and its ripple guide uses idle.
- Apart from the 13.0 V charging indicator, the sources do not say what a running-engine reading outside 13.7 to 14.7 V means.
- The sources do not give a battery disconnect procedure for this test.
- The sources do not cover airbag systems, high-voltage hybrid or EV systems, or vehicle-specific service values, and this post does not either.
FAQ
What voltage should an alternator produce?
Fluke’s battery guide says a good alternator should produce 13.7 to 14.7 V under normal conditions, measured at the battery terminals with the engine running. The sources we opened do not give figures for particular vehicles.
Why check the battery with the engine off first?
Fluke’s battery guide names two reasons to measure battery voltage: cranking performance and alternator output. It also says checking voltage is especially important before diagnosing deeper electrical problems. The engine-off reading tells you about the battery. The engine-running reading is the charging check.
Can I check the alternator with the engine off?
This method uses the engine-off reading to judge the battery and the engine-running reading to judge charging. The sources we opened do not describe an alternator output check with the engine off, so this post gives none.
Does this test measure ripple?
No. Fluke’s ripple guide describes an AC test of alternator output, which uses AC volts and its own thresholds. This post covers only the DC charging voltage.
Do I need a CAT rating for this test?
Check the rating on your own meter before you connect it. Fluke’s IEC category article lists CAT ratings by location. For a 12 V vehicle circuit, the sources we opened give no category, so this post does not name one.
What if the reading is outside 13.7 to 14.7 V?
The sources we opened do not say whether that reading is a fault. Fluke’s battery guide gives 13.7 to 14.7 V as normal and says a reading above 13.0 V with the engine running indicates charging voltage. Those are the only charging thresholds these sources give.
Sources
- Fluke, “How to Measure Battery Voltage with a Multimeter”: https://www.fluke.com/en-us/learn/blog/digital-multimeters/how-to-test-a-battery-with-a-multimeter
- Fluke, “How to Test Alternator Ripple Voltage with a Multimeter”: https://www.fluke.com/en-us/learn/blog/digital-multimeters/how-to-test-alternator-ripple-voltage-with-a-multimeter
- Fluke, “Guide to Digital Multimeter Safety”: https://www.fluke.com/en-us/learn/blog/safety/multimeter-guide
- Fluke, “IEC Category Ratings: Use the Right Tools for the Job”: https://www.fluke.com/en-us/learn/blog/safety/iec-category-ratings-use-the-right-tools-for-the-job
- Fluke, “Electrical Resource & Solutions”: https://www.fluke.com/en-us/learn/blog/electrical/cat-ratings-explained
- Fluke, safety information for an insulation multimeter (models 1587 FC, 1587 and 1577): https://media.fluke.com/853f6340-6674-454e-90e3-b2c20137a271_original%20file.pdf
- OSHA, “Electrical – Overview”: https://www.osha.gov/electrical
- OSHA, “1910.333 – Selection and use of work practices”: https://www.osha.gov/laws-regs/regulations/standardnumber/1910/1910.333
- Purdue University, Herrick Laboratories, battery safety handout: https://engineering.purdue.edu/Herrick/about/information/Safety/Batterysafety.pdf
- West Virginia University Environmental Health and Safety, “Lead-Acid Battery Safety”: https://www.ehs.wvu.edu/files/d/0c032a15-ce2c-49b8-8d44-2d6391af0335/lead-acid-battery-safety.pdf
- Mazda, “Inspecting Lead-acid Battery,” 2026 CX-50 owner’s manual: https://www.mazdausa.com/static/manuals/2026/cx-50/contents/69060500.html
- California State University, Long Beach, College of Engineering, Chevy engine lab sheet: https://www.csulb.edu/sites/default/files/document/chevy-engine-coe.pdf