How to Test a Car Battery with a Multimeter: Steps and Readings
As an Amazon Associate we earn from qualifying purchases. Details
Updated 20 October 2026
Author: Ken
Searchers who type how to multimeter car battery usually want a sequence they can follow in a driveway: which setting to use, where the leads go, what to read with the engine off, what to read with the engine running, and when to stop. This guide gives that sequence. Its method comes from a Purdue Extension sheet on DC voltage, and its safety points come from a U.S. EPA tip sheet and a Canadian occupational health page. None of those sources gives a pass or fail voltage for a car battery, so the guide shows where that number has to come from.
Quick answer
- Set the meter to DC voltage, touch the red lead to the positive post and the black lead to the negative post, then read the display.
- Take two readings, one with the engine off and one with the engine running, and write down both numbers with the time.
- Stop if the battery bulges, leaks, corrodes, has odors or shows damaged wires. The EPA tip sheet lists these as signs of battery damage.
- The sources give no threshold for either reading, so the battery label or the vehicle manual sets the number you compare against.
What the three sources cover
This guide uses three sources, and each one has a limit that matters for a car battery.
The EPA tip sheet is written for governments and for businesses and organizations that collect household small format batteries. It places lead-acid among the chemistries that can pose health and safety risks, and it lists the signs of battery damage. It does not describe car batteries, and its weight limits do not fit one, so this guide takes its damage signs and its general risk statement and leaves out the rest.
The Purdue sheet is a 4-H electric project on voltage meters. It explains that voltage is the difference between two points, such as the positive and negative ends of a battery. It gives the DC voltage setting and the lead placement, and it gives a general caution for live circuits. Its one numeric example, about 3 volts, comes from the batteries on a training circuit board. That is not a car battery figure, and this guide does not use it as one.
The CCOHS page covers industrial lead-acid batteries and the charging areas where they are used. It names the main risks, gives a first-aid step for acid contact, and lists protective equipment. Its section on ventilation is written for charging areas, so this guide does not apply it to a car.
Safety first
The EPA tip sheet says that every battery chemistry, lead-acid included, can pose health and safety risks when it is damaged or defective. The risks it names are fire, leakage of toxic substances, and injury from chemical burns or electric shock. It also warns that some defects, such as damage to internal safety parts, may not be visible on inspection. A battery that looks acceptable can still be defective, so a clean look does not clear it.
The CCOHS page names two primary risks for lead-acid batteries. The first is hydrogen gas that forms while the battery is being charged. The second is the sulfuric acid in the battery fluid, which the page also calls the electrolyte. For hydrogen, the page gives explosive limits of 4.1 to 72 percent hydrogen in air. That figure comes from a charging-area setting, so read it as the reason charging needs care. It is not a distance rule for a car parked in a driveway, and the sources give no such rule. The same page says that improper handling of batteries can lead to shocks and electrocution.
If acid reaches your skin or eyes, the page’s example first-aid step is to flush the area right away for at least 30 minutes with clean, lukewarm, gently flowing water, using an eye wash station or shower where one is available. It also recommends chemical protective gloves and eye and face protection as necessary.
The Purdue sheet adds two points that apply to any meter. Working with live electrical circuits can be very hazardous without proper tools and safeguards, and you should move cautiously while probing a circuit. Keep both points in mind for every step below.
Step 1: Inspect the battery before you connect anything
The EPA tip sheet lists the signs of battery damage as bulging or swelling, odors, excess heat, smoke, discoloration, corrosion, damaged wires, leaking and odd noises. Check the battery for each of them before a lead goes on a post.
If you see any one of these signs, stop. Do not connect a meter to a battery that shows them. The EPA sheet says that disposal rules come from state, county and local agencies, so the steps for a damaged battery are at the end of this guide.
Even a battery with no visible sign gets both readings below, since the EPA sheet notes that some defects do not show on inspection.
Step 2: Set the meter to DC voltage
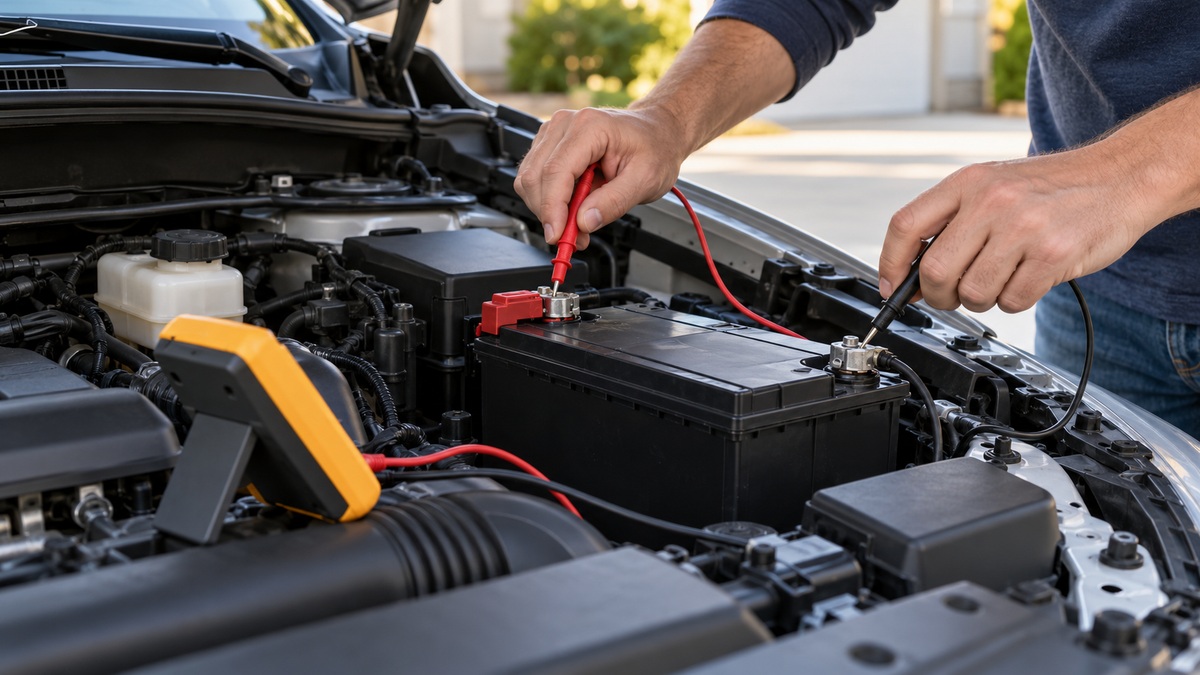
The Purdue sheet tells you to set the meter to DC voltage, touch the red test lead to the positive end of the battery and the black test lead to the negative end. The sheet treats a battery as the DC case, so the AC setting is not part of this procedure.
Check two things on the meter before you connect it.
The first is the function. Make sure the dial or screen is on DC voltage and not on AC voltage, resistance or current. The SNAKOL listing says its protection guards against an accidental overload of the ports or a wrong range choice while you trace a faulty circuit. That is a warning that range and port choice matter on that meter, and the listing gives no further detail.
The second is the range. On a manual-ranging meter, pick a DC range that can show 12 volts. This is our reasoning, not a figure from a source: a range that cannot reach 12 volts cannot show the battery’s voltage. The sources do not name a range for a car battery, so the range your meter manual recommends is the one to use. An auto-ranging meter picks its range by itself.
If your meter has a needle instead of digits, the analog meter in the cards below has one. Its listing describes a needle display, and the sources do not explain how to read its scale. Read the scale your meter manual marks for DC volts.
Step 3: Read the battery with the engine off
This is the resting reading. The Purdue sheet says the best place to read the starting voltage is at the batteries or the source of the power, so this step uses the battery posts and nothing else.
- Turn the engine off.
- Set the meter to DC voltage, on a range that covers 12 volts.
- Touch the red lead to the positive post and the black lead to the negative post.
- Read the display, or the needle on an analog meter. Write down the number, the time and the meter setting.
- Compare the number with the battery label or the vehicle manual.
The sources leave several things open. They give no rest time after driving, and they do not say which accessories should be switched off before the reading. They do not give a resting voltage for a healthy car battery, or a voltage that means the battery is bad. The Dexumodbk listing says that a voltage below 12.5 V means you should stop using electrical devices to avoid starting trouble. That is a seller statement for a plug-in voltmeter, and this guide has no battery specification to check it against, so it is not used as a threshold here.
A resting number is a reading, not a verdict. If it does not match the battery label or the vehicle manual, or if the number is unclear, ask a qualified technician to check the battery before you decide anything.
Step 4: Read the battery with the engine running
This is the charging check. The sources we opened do not describe an engine-running reading at the battery posts. This step applies the same DC method from the Purdue sheet to a running engine, and the caution about live circuits applies in full.
The CCOHS page ties its hydrogen risk to charging, and it calls the gas explosive in certain concentrations in air. The page gives no ventilation or distance rule for a car, so this guide does not give one either. Use the Purdue caution directly: move cautiously while probing circuits.
- Take the resting reading from Step 3 first and write it down, so the two numbers can be compared.
- Keep the meter on DC voltage, with the red lead on the positive post and the black lead on the negative post.
- Start the engine, then read the display once the number holds steady.
- Write down the number with the note “engine running”, and compare it with the battery label or the maker’s specification.
- Turn the engine off once the reading is recorded.
None of the sources gives a voltage that means the charging system is working or failing, and none gives a range for a running engine. The Purdue sheet makes a related point: a voltage reading is not useful until you also understand the voltage potential and the loads in the circuit. A difference between the resting and running numbers is therefore a reason to look closer, and the maker’s specification is the figure to check it against.
Step 5: Use a plug-in voltmeter for a running check
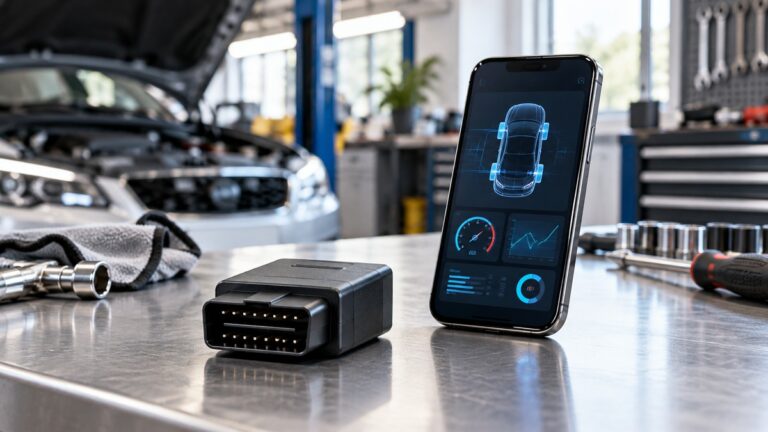
Two of the cards are voltmeters that plug into the 12 V socket. The MUQIDA listing says its voltmeter monitors car battery voltage in real time, and the Dexumodbk listing says its USB charger continuously monitors vehicle voltage in real time. Both describe a running check through the socket.
A number from a socket is a different measurement from a number at the posts. The Purdue sheet defines voltage as the difference between two points, so the socket and the battery posts are two different points, and each number answers its own question. Neither listing compares the two, and neither gives a voltage range or an accuracy figure, so this guide does not say how closely they agree.
Use a plug-in voltmeter to watch the trend while the vehicle runs, and use the meter at the posts for the number you record. For a wider look at plug-in voltmeters, see car lighter voltmeter.
Step 6: Use a test light for polarity
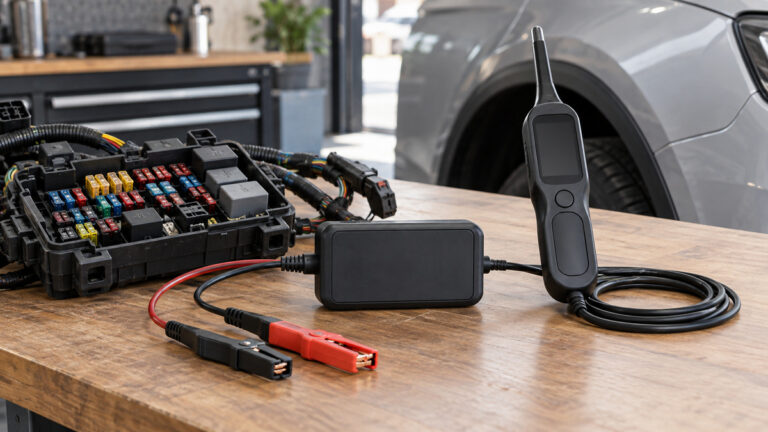
The ATOBLIN listing describes a test light with a clamp that attaches to either the negative or the positive side. Its red LED shows positive polarity and its green LED shows negative polarity. The listing gives a DC testing range of 4 to 75 V, says the tool beeps during a test, and says the screen shows OL when the voltage goes above 75 V.
Use the test light to confirm which post is positive before you set the leads, since the Purdue sheet asks you to put the red lead on the positive end. A test light answers a narrower question than a multimeter. It shows polarity through its LEDs, and the listing gives no accuracy figure for any number it shows, so it does not replace the meter reading.
For a dedicated battery voltage tool, see battery voltage tester.
What each reading can and cannot tell you
The table sets out each reading, the method behind it, what the sources say about a threshold, and where to find the number you compare it with.
| Reading | Method | Threshold in the sources | Where to check |
|---|---|---|---|
| Resting, engine off | DC volts at the battery posts, Purdue method | None | Battery label or vehicle manual |
| Running, engine on | DC volts at the battery posts, same leads | None, and no running figure | Battery label or maker’s specification |
| Socket trend, engine running | Plug-in voltmeter in the 12 V socket | None; the listing gives no range | The voltmeter’s own instructions |
| Polarity | Test light LEDs at the clamp | None; shows polarity only | The test light’s own instructions |
Read the table in one direction. The posts give the number this guide asks you to record, the socket gives a trend, and the test light gives polarity. No row gives a pass or fail figure, so the number you compare against always comes from the battery label, the vehicle manual or the maker.
Two limits apply to every row. The Purdue sheet says a voltage reading is not useful until you also understand the voltage potential and the loads in the circuit. The EPA sheet notes that some battery defects do not show on inspection, so a visual check alone cannot settle the question.
What each card measures
The table restates what each card’s listing says it measures, the figure the listing gives, and what it leaves out. Every entry comes from the title, bullets or specification lines in the research record. No figure here is a battery specification.
| Card | What the listing says it measures | Figure the listing gives | What the listing leaves out |
|---|---|---|---|
| SNAKOL analog multimeter | AC and DC voltage, DC current, resistance, continuity, diode, transistor and battery charge levels | AC/DC voltage up to 2500V; fuses 0.5A/250V and 10A/250V | Accuracy figure, CAT rating, description of the test leads |
| MUQIDA cigarette lighter voltmeter | Car battery voltage in real time, on a red and blue LED display | Standard 12V cigarette lighter connector | Voltage range, accuracy |
| Dexumodbk 4-in-1 car voltmeter | Battery voltage and cabin temperature on an LCD, plus USB charging | USB outputs of 5V/2.4A, 9V/2A and 12V/1.5A; cabin temperature from -10°C to 80°C | Voltage range, accuracy |
| ATOBLIN automotive test light | DC voltage from 4 to 75 V, with polarity shown by LEDs | 4-75V DC range; OL shown above 75V | Accuracy figure, CAT rating |
The four meters that fit these steps
Each card stays because its listing matches one of the steps: the analog multimeter for the posts, the plug-in voltmeters for the socket trend, and the test light for polarity. Each card gives a skip-if line and a limitation. The order follows the steps, not any rank.
1. Analog Multimeter Tester, Analog Voltmeter Multimeter, Fieldpiece Volt Meters and Multimeters (Analog multimeter for DC volts at the posts)
Specs from the listing (checked ):
- Measurement Type: Multimeter
- Included Components: Battery + Fuse
- Style: Basic
Pros
- The listing gives AC/DC voltage up to 2500V, so its maximum range is well above 12 V
- The listing names battery charge levels among its functions and warns about selecting the wrong range
- The listing gives 0.5A/250V and 10A/250V fuses and says a spare fuse is kept in the battery compartment
Cons
- The listing gives no accuracy figure and no CAT rating
- The listing describes an analog needle display, so the scale has to be read by eye
Best for: A reader who wants one meter for the resting and running readings at the posts
Skip if: You want a digital readout, auto-ranging or a CAT rating for household mains work
View on Amazon (affiliate link)
2. Automotive Test Light 4-75V DC LCD Digital Voltage Tester with Buzzer Sound, Auto Circuit Tester (Test light with a 4-75V DC range for polarity)
Specs from the listing (checked ):
- Model: AT-621
- Power Source: Corded Electric
- Style: LCD Digital Display
Pros
- The listing gives a 4-75V DC testing range and names car batteries among its uses
- The listing says the clamp attaches to either the negative or the positive side
- The listing describes red and green LEDs for positive and negative polarity
Cons
- It is a test light with an LCD display, not a multimeter, and the listing gives no accuracy figure
- The listing does not state a CAT rating or any figure that can be recorded
Best for: Confirming which post is positive and whether DC voltage is present before the meter goes on
Skip if: You need a number you can record or compare with a specification
View on Amazon (affiliate link)
3. Car LED Cigarette Lighter Voltmeter, DC 12V-24V Vehicle Cigarette Lighter Digital Voltage Meter (Plug-in voltmeter for a running check through the socket)
Specs from the listing (checked ):
- Compatible Devices: car, SUV, van, truck, motorcycle
- Included Components: Car LED Cigarette Lighter Voltmeter
- Model: Car LED Cigarette Lighter Voltmeter
Pros
- The listing says it shows car battery voltage in real time through the cigarette lighter socket
- The listing describes a red and blue LED display that can be read from a distance
- The listing offers a one-piece set and a two-piece set for one or several vehicles
Cons
- The listing gives no voltage range and no accuracy figure
- It reads through the socket, so it does not show a reading at the battery posts
Best for: Watching voltage on one car or several cars while the engine runs
Skip if: You need a reading at the battery posts or a load check
View on Amazon (affiliate link)
4. 4 in 1 Car Voltmeter,USB Charger Adapter QC3.0+PD3.0 Auto Cigarette Lighter Voltage Meter Vehicle (Plug-in voltmeter with USB ports for a running check)
Specs from the listing (checked ):
- Model: BS123-DBK-US1
- Warranty Description: 1 year manufacturer
- Compatible Devices: smartphones, GPS navigators, tablets
Pros
- The listing shows battery voltage on an LCD, with cabin temperature on the same screen
- The listing gives USB outputs of 5V/2.4A, 9V/2A and 12V/1.5A for two devices at once
- The listing names a 1 year manufacturer warranty
Cons
- The listing gives no voltage range and no accuracy figure for the battery reading
- Its Compatible Devices line names smartphones, GPS navigators and tablets, which conflicts with its title
Best for: A car owner who wants a running voltage display and a USB port in one plug
Skip if: You need a meter for battery terminals or a logged number
View on Amazon (affiliate link)
Other listings in the research set
The research set also holds listings that do not fit these steps. Among them are a battery analyzer built around load and cranking tests, a capacity checker made for drone and RC packs, a USB charger with a voltage display as a side feature, a second plug-in voltmeter that does the same job as one of the cards, several lead and probe kits that are accessories rather than meters, and two car battery load testers whose research records have a title but no bullets or specification lines. None of them gets a card. The load and cranking tests that an analyzer runs are a different method from the voltage check this guide covers.
For a general look at how voltage testers read a battery, see how voltage testers work. For handheld meters in general, see hand held digital multimeter.
How we chose
We read each of the twelve records in the research set against three tests. The listing has to describe a meter or tester that reads DC volts or battery voltage. The listing has to give text we can work with, meaning a title, bullets or specification lines. And the listing has to be a meter or tester rather than an accessory, a charger, or a tester for another kind of battery.
Five records pass all three tests. Four become cards, and each card has to fit one step: a post reading, a socket trend or a polarity check. The fifth is a second plug-in voltmeter that does the same job as one of the cards, so the set keeps two plug-in voltmeters and no more. Each card’s pros and cons come from a line in its own record, and each card names a case where it is not the right pick.
What we could not verify
- Accuracy for every card. None of the listings gives an accuracy figure for its readings.
- A resting or running voltage for a healthy car battery. The sources give none, so this guide names no number for a good or a bad battery.
- The rest time before a resting reading, and which accessories should be off during it.
- The range setting on a manual-ranging meter for a 12 V battery. The sources do not name one.
- Whether a socket reading matches a post reading, including with the ignition off. The two listings do not say how the socket behaves then.
- The CAT rating of each card. No card states one in its listing.
- Whether any card fits a 24 V system. Only the Dexumodbk listing names 24 V vehicles, and the other three do not name a 24 V system.
- The test leads on the analog meter. Its listing does not describe them.
- The Dexumodbk statement about 12.5 V, which is a seller statement with no battery specification behind it.
- Whether the EPA damage signs cover every car battery condition, since the sheet is written for collection sites.
- Whether the CCOHS figures apply to a car in a driveway, since the page is written for industrial batteries in charging areas.
- Whether the Purdue example of about 3 volts applies to any battery other than the training board it describes.
FAQ
Can I check a car battery with the engine running?
Yes, Step 4 covers that reading. Start with the engine off so you have a resting number to compare against. The sources describe the hazards around charging, but none gives a voltage that means the charging system is working or failing, so compare the running number with the battery label or the maker’s specification.
Which setting do I use on the multimeter?
Use DC voltage. The Purdue sheet puts the meter on DC voltage, with the red lead on the positive end and the black lead on the negative end. On a manual-ranging meter, choose a DC range that can show 12 volts. The sources do not name an exact range, so follow your meter manual.
What voltage means my car battery is bad?
None of the sources gives a pass or fail voltage, and no listing in this set gives one for a car battery. Compare your reading with the battery label or the vehicle manual. If the number is unclear, or if the battery is old or shows any sign of damage, ask a qualified technician to check it.
Is a plug-in voltmeter enough for a car battery check?
It is enough to watch voltage while the vehicle runs. It is not a substitute for a reading at the posts, because it reads through the socket. The listings do not compare the two methods, so the difference between them rests on what each listing says it measures and on the Purdue point that voltage is a difference between two points.
What do I do with a damaged car battery?
Do not connect a meter to a battery that bulges, leaks, corrodes, has odors or shows damaged wires. The EPA sheet says disposal requirements come from state, county and local agencies, so check those rules before you take the battery anywhere. The sheet’s collection advice is written for collection sites, so ask your local agency what applies to you.
Does the 3-volt example in the Purdue sheet apply to my car?
No. The example is a reading on the batteries of a training circuit board, not a car battery. Use the battery label or the vehicle manual for the number that applies to your car, and do not treat the training board figure as a target.
Bottom line
Set the meter to DC voltage, touch the red lead to the positive post and the black lead to the negative post, and stop if the battery shows any sign of damage. Record one number with the engine off and one with the engine running, then compare both with the battery label, the vehicle manual or the maker’s specification. Use the plug-in voltmeters to watch the running trend and the test light to confirm polarity, and treat neither as a verdict on the battery.
Sources
- Collecting Household Small Format Damaged and Defective Batteries (U.S. EPA tip sheet, June 2026): damage signs, lead-acid among the chemistries, and the sheet’s collection-site scope; opened 20 October 2026
- Battery Charging – Industrial Lead-Acid Batteries (Canadian Centre for Occupational Health and Safety, OSH Answers): hydrogen and acid risks, explosive limits, shock risk, first-aid step and protective equipment; opened 20 October 2026
- Voltage Meter Basics (Purdue University Cooperative Extension, 4-H Electric project sheet): voltage as a difference between two points, DC setting and lead placement, the training-board example, and the live-circuit caution; opened 20 October 2026